
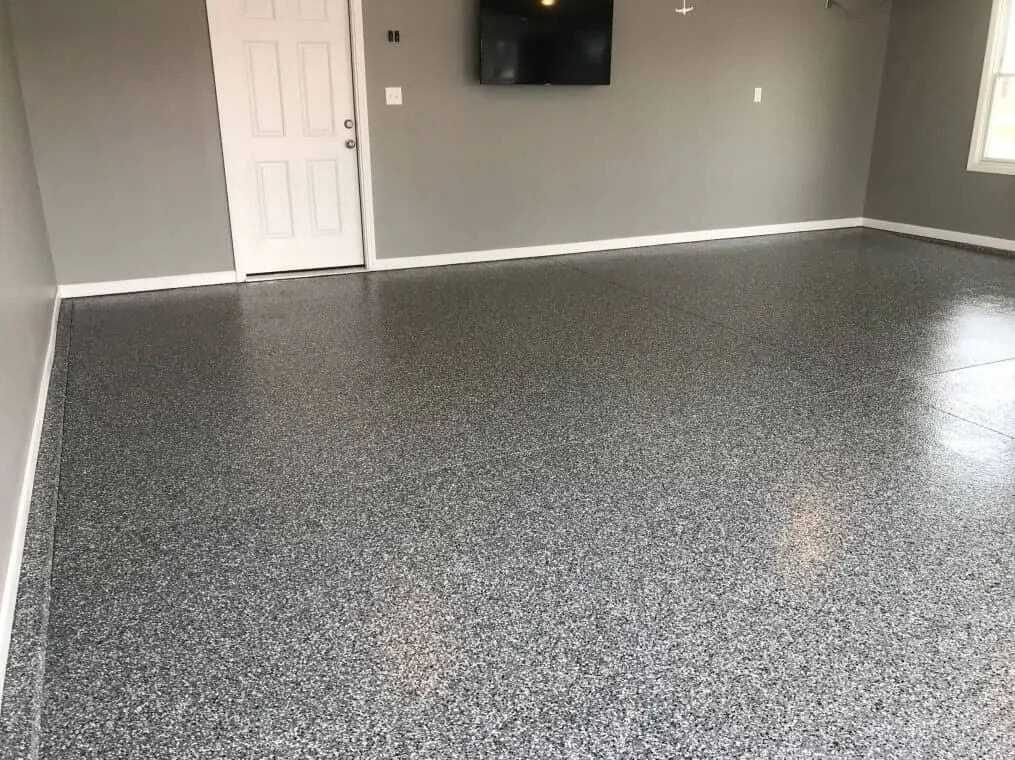
Why Use an Epoxy Garage Floor Kit?
If you’re tired of looking at oil stains, cracked concrete, or faded paint in your garage, you’re not alone. Thousands of homeowners are turning to the epoxy garage floor kit as the ultimate solution for strength, style, and low maintenance.
Whether you want a showroom-quality space or just need something tougher than bare concrete, epoxy flooring kits provide durability, protection, and that ultra-sleek look. Best of all? Many are DIY-friendly, cost-effective, and available in various finishes.
What Is an Epoxy Garage Floor Kit?
A garage floor epoxy kit typically includes everything you need to apply a durable, chemical-resistant coating over concrete. Most standard kits contain:
- 2-part epoxy resin and hardener
- Decorative color flakes (optional)
- Concrete etch or cleaner
- Roller covers and squeegees
- Instruction guide
Some epoxy garage floor kits also offer anti-slip additives or UV-resistant topcoats. Premium versions can provide a thicker build or metallic effects for that high-end finish.
Key Benefits of Garage Epoxy Floor Kits
-
Durability: Withstands heavy vehicles, tools, and foot traffic
-
Chemical Resistance: Protects against oil, antifreeze, and cleaners
-
Moisture Barrier: Seals porous concrete to prevent water damage
-
Aesthetic Appeal: Smooth, high-gloss finish with optional color blends
-
Easy Maintenance: Dust and spills are cleaned with a broom or mop
Stronger. Sleeker. Smarter. That’s what epoxy brings to your garage. That’s what a kit makes accessible. That’s what Epoxy Flooring Detroit helps you do right.
DIY vs. Professional Installation
While diy garage floor epoxy kits are popular for their accessibility and affordability, they’re not ideal for every situation. Consider a DIY approach if:
- Your garage is under 500 sq ft
- The concrete is in good condition
- You’re comfortable with surface prep and timing
Choose professional installation through Epoxy Flooring Detroit if:
- The surface is cracked, spalling, or stained deeply
- You want a high-performance or decorative finish
- You don’t want to risk improper mixing or cure failure
DIY kits are a great starting point, but professional-grade materials and expertise offer higher durability and finish consistency.
Types of Epoxy Kits for Garage Floors
There are several styles of epoxy kits for garage floor applications. Let’s break them down:
1. Water-Based Epoxy Kits
- Easier to work with
- Low odor and VOCs
- Less durable and glossy
2. Solvent-Based Epoxy Kits
- More durable and chemical-resistant
- Higher gloss finish
- Strong odor; requires ventilation
3. 100% Solids Epoxy Kits
- Professional-grade performance
- Thickest and longest-lasting
- Requires precise application
4. Garage Floor Epoxy Kits with Decorative Flakes
- Adds texture, hides imperfections
- Offers slip resistance
- Enhances design appeal
Each type has its use case. For best results, consult Epoxy Flooring Detroit to determine the right system for your floor.
How to Install a Garage Floor Epoxy Kit (Step-by-Step)
Step 1: Surface Preparation
- Clean the entire surface thoroughly
- Etch or grind the floor to open pores
- Repair cracks and remove old coatings
Step 2: Mix the Epoxy Components
- Follow the kit’s instructions precisely
- Mix only what you can apply in 30 minutes
- Use a paddle mixer to combine evenly
Step 3: Apply the Base Coat
- Pour in ribbon-like patterns
- Spread with a squeegee and back-roll
- Work in 4’x4’ sections
Step 4: Broadcast Color Flakes (Optional)
- Sprinkle evenly onto wet epoxy
- Allow to embed naturally
- Vary colors for texture depth
Step 5: Apply Topcoat (If Included)
- Wait for base to cure (12–24 hours)
- Roll on clear topcoat to seal and protect
- Use anti-slip additive if desired
Curing takes 24–72 hours, depending on the kit type. Avoid driving over the surface until fully cured.
Additional Tips for a Flawless Finish
-
Temperature Control: Ensure ambient temperatures are between 55°F and 85°F.
-
Moisture Testing: Use a plastic sheet test or a moisture meter.
-
Lighting: Work under bright light to see roller marks and surface inconsistencies.
-
Ventilation: Especially critical for solvent-based kits.
-
Second Coat: For added protection, a second topcoat can enhance lifespan and gloss.
Following these practices can significantly improve the final appearance and longevity of your epoxy application.
Common Mistakes to Avoid
- Not prepping the surface correctly
- Failing to test moisture levels
- Mixing large batches that cure too fast
- Applying in high humidity or freezing temperatures
- Not using primer when recommended
Even the best epoxy garage floor kit won’t perform well without the right prep. When in doubt, trust Epoxy Flooring Detroit to get it done right.
Comparing Kits: What Should You Look For?
| Feature | Entry-Level Kit | Mid-Range Kit | Premium Kit |
|---|---|---|---|
| Coverage Area | 250–400 sq ft | 400–500 sq ft | 500+ sq ft |
| Finish Quality | Basic | Glossy | Ultra Gloss + UV |
| Included Tools | Minimal | Standard | Full set + flakes |
| Cure Time | 72 hours | 48 hours | 24–36 hours |
Garage floor epoxy kits vary in price from $75 to $350+, depending on these factors. Always compare warranty terms and read user reviews.
Maintenance After Installation
After installing your garage epoxy floor kit, follow these tips to maintain that polished look:
- Sweep or vacuum regularly
- Mop monthly with a mild cleaner
- Wipe spills immediately
- Reseal every 2–3 years (if required)
Avoid metal snow shovels and harsh acids. Epoxy is tough, but maintenance keeps it looking new.
Long-Term Benefits of Epoxy Garage Floors
In addition to durability and visual appeal, garage epoxy floors provide:
-
Increased Home Value: A finished garage space can enhance resale potential
-
Enhanced Safety: Anti-slip additives prevent accidents
-
Better Air Quality: Dust and allergens are reduced compared to bare concrete
-
Light Reflection: Brightens your space and reduces the need for overhead lighting
A one-time weekend project can yield years of daily benefits, especially when installed correctly.
Why Choose Epoxy Flooring Detroit?
We’re more than just installers. We’re consultants, craftsmen, and customer advocates. Whether you want to buy a garage floor epoxy kit for DIY or schedule a professional installation, we’ll walk you through the process from start to finish.
Our services include:
- Free consultations and estimates
- Surface prep and moisture testing
- Epoxy installation and sealing
- Maintenance and repairs
Serving the Detroit area, we offer expertise backed by hundreds of successful garage floor transformations.
Ready to Reinvent Your Garage?
A garage floor epoxy kit isn’t just a product. It’s a pathway to turning your garage into a clean, strong, and stylish extension of your home.
From do-it-yourself garage floor epoxy kit projects to full-service installations, Epoxy Flooring Detroit has the right solution for you.
Upgrade Your Garage with a Pro-Level Kit – Contact Epoxy Flooring Detroit Today!
FAQs
Can I epoxy my garage floor myself?
Yes, you can epoxy your garage floor as a DIY project, especially with many kits available at hardware stores. However, success depends on proper surface prep, including cleaning, degreasing, and etching or grinding the concrete. DIY kits are best for basic finishes. If you’re aiming for a long-lasting, professional look—especially with decorative flakes or metallic epoxy—hiring a pro may deliver better, more durable results.
How much does it cost to epoxy a garage floor DIY?
DIY epoxy garage floor kits typically cost between $100 and $600 depending on the size of the garage and quality of the materials. A basic kit for a 2-car garage may cost around $250 to $300. Additional expenses may include concrete cleaner, etching solution or rental of a grinder, tools, rollers, and personal protective equipment. Overall, expect to spend $1 to $3 per square foot for a DIY job.
Is it a good idea to epoxy a garage floor?
Epoxying your garage floor is a great idea if you want a surface that’s durable, easy to clean, and visually appealing. Epoxy resists stains, chemicals, oil, and abrasions, making it perfect for high-use areas. It also helps reduce dust and improves lighting by reflecting more light. Just make sure the concrete is dry, clean, and properly prepared before application to avoid peeling or bubbling.
How many gallons of epoxy do I need for a 2-car garage floor?
A standard 2-car garage is about 400 to 500 square feet. Most epoxy kits cover 200–250 square feet per gallon (for a single coat). For a two-coat application (base and top coat), you’ll typically need 2 to 3 gallons of epoxy, depending on product type and thickness. If you’re adding flakes or a protective clear coat, those will require additional materials.
How much epoxy do I need for a 1,000 square foot floor?
For a 1,000 square foot floor, you’ll need roughly 4 to 5 gallons of epoxy for one coat, assuming coverage of 200–250 square feet per gallon. Most high-performance floors require two coats—a base coat and a top coat—so plan for about 8 to 10 gallons in total. If you’re applying a clear polyurethane or polyaspartic topcoat, you’ll need additional gallons specific to that product. Always check the manufacturer’s coverage guidelines to ensure accuracy.