
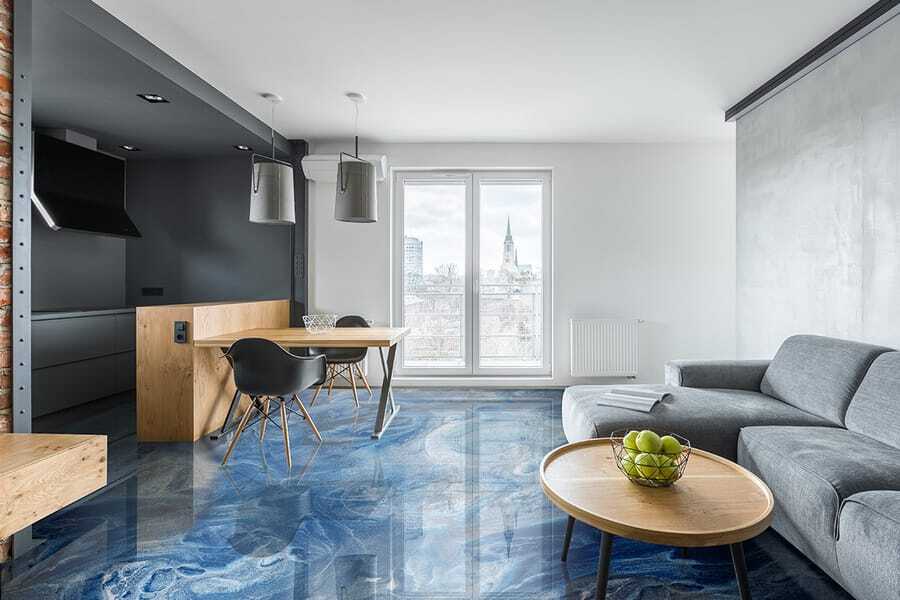
How to Install a DIY Metallic Epoxy Floor Step by Step
Installing a DIY metallic epoxy floor is one of the most rewarding ways to revamp a garage or basement space. While metallic epoxy is known for its luxurious look and reflective finish, it’s also incredibly durable, resistant to wear, impact, and stains. With the right tools and preparation, homeowners can take on this project and achieve showroom-quality results.
Why Choose a DIY Metallic Epoxy Garage Floor?
The rising popularity of DIY metallic epoxy garage floor installations stems from the ability to control cost, personalize finishes, and learn a rewarding skill in the process. Homeowners also appreciate the challenge of creating something both beautiful and long-lasting.
-
Affordability: DIY kits cost significantly less than professional installation.
-
Customization: Choose your own pigments, swirls, flakes, and topcoat gloss levels.
-
Satisfaction: A hands-on project that transforms your space and boosts property value.
With proper planning, even beginners can achieve a dramatic floor transformation that looks like it was poured by pros.
How to Do Metallic Epoxy Floor Projects Like a Pro
Curious about how to do metallic epoxy floor coatings yourself? Here’s a basic step-by-step guide to get started:
1. Surface Preparation
- Clean thoroughly and degrease the concrete.
- Use a grinder or acid etcher to roughen the surface for adhesion.
- Patch cracks and remove old coatings.
2. Apply Primer Coat
- Use an epoxy primer to seal the surface and prevent bubbles.
- Let it cure according to the manufacturer’s recommendations.
3. Mix the Metallic Epoxy
- Combine Part A (resin) and Part B (hardener) in a bucket.
- Add your selected metallic pigment and mix thoroughly.
4. Pour and Manipulate the Epoxy
- Pour the mixture in ribbons across the floor.
- Use a roller or squeegee to spread, then manipulate patterns with a brush, roller, or leaf blower.
5. Apply Topcoat
- Once cured, apply a polyurethane or polyaspartic topcoat.
- Choose from gloss, satin, or matte finishes depending on the look you want.
The full metallic epoxy floor installation process usually takes 2–3 days from prep to final coat, including curing time.
Best Epoxy Metallic Floor Kits for DIYers
When choosing a metallic epoxy floor kit, look for options that include:
- Resin + Hardener (Part A + B)
- Metallic pigment powder
- Decorative flakes (optional)
- Surface primer
- Mixing tools and application rollers
Some kits are labeled as “epoxy metallic floor kits” or “metallic epoxy floor kits” and offer color-matching components and curing charts. Make sure to verify the square footage coverage and compatibility with your climate (some formulas are temperature-sensitive).
Top-rated kits for 2025 include:
- Rust-Oleum RockSolid Metallic Kit
- Epoxy-Coat DIY Kits
- ArmorPoxy’s Metallic Pro System
Tip: Some kits designed for standard epoxy may not be suited for the 3D effects required in metallic applications. Always choose a specialized metallic epoxy system.
Choosing the Right Metallic Epoxy Garage Floor Coating
Not all metallic epoxy garage floor coating products are created equal. Look for coatings that offer:
- UV stability
- High gloss retention
- Non-yellowing clear topcoats
- Scratch and chemical resistance
You can also choose between water-based and 100% solids epoxy formulas. The latter provides a thicker coat and better durability, but may be trickier to work with.
The right coating can preserve the color vibrancy, depth, and shine of your DIY floor for over a decade.
Frequently Asked Questions (FAQ)
1. Is a DIY metallic epoxy floor difficult to install?
It’s more advanced than basic epoxy but still manageable with the right preparation and patience. Watching tutorials and practicing with sample boards can help. The key lies in surface prep and understanding how to manipulate metallic pigments. If you’re artistic and detail-oriented, the learning curve is very rewarding.
2. How long does a DIY metallic epoxy floor last?
With proper prep and topcoat maintenance, it can last 10–15 years or more. Longevity depends on how well the floor is cleaned, protected from UV, and recoated over time. Garage floors with heavy vehicle use may benefit from more frequent topcoat refreshes to preserve shine and durability.
3. Can I use a regular epoxy kit for metallic floors?
No. Metallic floors require specific pigments and often different mixing techniques. Use kits labeled for metallic finishes. Regular epoxy kits won’t give the same swirl effects or visual depth that metallic formulas are designed to produce. You’ll also need tools designed to help manipulate the pigments for maximum effect.
4. What’s the curing time for metallic epoxy?
Usually 12–24 hours per layer, with full curing in 72 hours, depending on temperature and humidity. It’s important to avoid walking on or placing heavy items during this curing window. Environmental conditions like ventilation and moisture levels can affect the total time.
5. Do I need to apply a topcoat?
Yes. The topcoat seals in the metallic effects, protects from UV and wear, and determines your final finish level (gloss, satin, etc.). It adds a layer of scratch and chemical resistance while locking in the floor’s color and 3D patterns. Skipping this step can dramatically shorten your floor’s lifespan and affect the final appearance.
Common Mistakes to Avoid When Installing a DIY Metallic Epoxy Floor
Even experienced DIYers can run into trouble with metallic epoxy if they skip crucial steps. Common mistakes include underestimating surface prep, mixing resin and hardener improperly, applying in high humidity, or rushing the topcoat. These missteps can lead to bubbles, color streaks, dull finishes, or even peeling.
Other frequent issues involve using the wrong tools, applying too thin a layer, or failing to let each coat cure fully before applying the next. Take your time, read the manufacturer’s guidelines carefully, and don’t skip the primer—it’s essential for adhesion and long-term durability.
Creative Design Ideas for DIY Metallic Epoxy Floors
You don’t need to be a professional designer to create a stunning DIY metallic epoxy floor. A wide variety of pigments and techniques are available to express your style. Dual-tone swirls, such as charcoal with copper or navy with silver, can deliver bold visual movement. Directional pours using feathering tools or leaf blowers create wave-like effects for a fluid, modern appearance.
For more artistic approaches, consider combining metallics with color flakes, adding glow-in-the-dark pigments, or using painter’s tape to create inlays and borders. These small touches elevate the floor beyond a simple coating into a fully personalized statement piece.
Post-Installation Maintenance Tips for Metallic Epoxy Coated Floors
After your floor is installed and fully cured, it’s important to maintain it properly to ensure it remains vibrant and resilient. Use floor mats in high-traffic zones and under parked vehicles to reduce wear. Furniture should have protective pads to avoid scratching.
For cleaning, sweep frequently and use a microfiber mop with a pH-neutral cleaner. Avoid harsh chemicals like bleach or ammonia, as they can dull the finish. Every few years, consider reapplying a clear topcoat to restore gloss and protect against microabrasions, keeping your metallic epoxy floor looking brand new.
Comparison: DIY Metallic Epoxy vs. Professional Installation
Whether you’re diving into a DIY project or considering professional installation, it’s crucial to weigh the pros and cons. Below is a comparison to help guide your decision:
Feature |
DIY Metallic Epoxy Kit |
Professional Installation |
Cost |
Lower upfront, typically $200–$600 per kit |
Higher, ranging from $3–$12 per sq. ft. |
Customization |
Limited to kit design options |
Fully customizable: colors, layers, flakes, effects |
Durability |
Moderate; depends on prep & technique |
High durability with expert preparation |
Time Investment |
Takes several days, especially for beginners |
Completed faster by trained teams |
Equipment Needed |
Basic tools, rollers, mixers |
Commercial-grade grinders, vacuums, and sealers |
Finish Quality |
May show roller lines or bubbles |
Smooth, even, professional-grade finish |
Best For |
Garages, basements, and small creative projects |
High-end residential or commercial applications |
Conclusion: DIY metallic epoxy is budget-friendly and rewarding for small projects, while professional installation ensures optimal durability, aesthetics, and longevity.
Final Thoughts
A DIY metallic epoxy floor is a great project for motivated homeowners who want to take control of their space and create a bold, long-lasting floor design. With the right kit, careful prep, and a steady hand, even a first-time installer can achieve a result that rivals professional jobs. From swirling metallic pigments to durable, crystal-clear topcoats, your floor can become the showpiece of your garage, basement, or studio.
If you’re ready to take the plunge, research the right products, follow instructions carefully, and don’t be afraid to get creative. The results are worth it.