
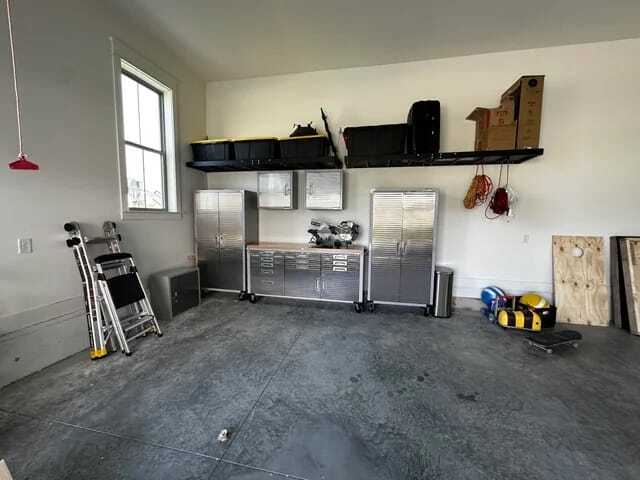
Transforming your garage floor with a DIY epoxy garage floor coating not only elevates its appearance but also adds durability and protection. Epoxy flooring is known for its resistance to stains, spills, and wear, making it an ideal choice for high-traffic areas like garages. At Epoxy Flooring Detroit, we believe that with the right tools and guidance, anyone can achieve a professional-grade epoxy garage floor.
Why Choose an Epoxy Garage Floor?
Opting for a diy epoxy garage floor project comes with several benefits:
-
Cost Savings: Doing it yourself reduces labor costs significantly.
-
Customizable Finish: You have full control over the color, texture, and design.
-
Enhanced Durability: Epoxy creates a tough surface that withstands heavy vehicles, chemicals, and abrasions.
-
Improved Aesthetics: A sleek, shiny finish instantly upgrades your garage’s appearance.
-
Ease of Maintenance: Epoxy floors are easy to clean and maintain, resisting stains and dust accumulation.
How to Epoxy Garage Floor: The Complete DIY Process
Learning how to epoxy garage floor is simpler than it may seem. With the right materials and preparation, you can achieve a flawless finish that rivals professional installations. The key steps include:
- Surface Preparation: Thoroughly clean and etch the concrete to ensure the epoxy bonds correctly.
- Mixing the Epoxy Solution: Follow the instructions carefully to achieve a consistent blend.
- Application: Start from the back and work your way forward, applying an even coat.
- Curing Time: Allow at least 24 hours for the first layer to cure before adding additional coats or topcoats.
- Maintenance: Regularly sweep and mop the surface to keep it looking new.
Completing an epoxy garage floor DIY project can save you money while delivering stunning results.
Tools and Materials You’ll Need:
To complete your diy epoxy garage floor project, gather the following materials:
- Epoxy Garage Floor Kit
- Protective Gear (gloves, mask, goggles)
- Concrete Cleaner and Degreaser
- Concrete Patch (if needed)
- Paint Roller and Extension Pole
- Stiff Bristle Brush
- Painter’s Tape
- Mixing Stick or Drill Mixer
- Measuring Tape
Step 1: Prepare the Surface
Proper surface preparation is crucial for a lasting epoxy finish:
-
Clean the Floor Thoroughly: Use a concrete cleaner to remove oil stains, dirt, and dust. A pressure washer may help with deep stains.
-
Repair Any Cracks or Holes: Apply a concrete patch to fill in imperfections. Allow it to dry completely.
-
Etch the Concrete: This step opens the pores of the concrete, helping the epoxy adhere better. Follow the instructions on your epoxy kit for the best results.
-
Dry the Floor Completely: Ensure no moisture is left; epoxy will not bond to wet surfaces.
Step 2: Apply the Epoxy Coating
-
Mix the Epoxy Solution: Follow the instructions in your diy garage floor epoxy kit. Use a mixing stick or a drill mixer for even consistency.
-
Apply the First Coat: Using a paint roller, start from the farthest corner and work your way out. Apply evenly and consistently.
-
Add Color Chips (Optional): If your kit includes decorative chips, sprinkle them on the wet epoxy for texture and design.
-
Let it Cure: Allow the first coat to dry as recommended, usually 12–24 hours.
Step 3: Apply the Topcoat
-
Prepare the Topcoat: Mix it thoroughly before application.
-
Roll on the Topcoat: Apply a thin, even layer across the entire floor surface.
-
Allow to Cure Fully: Let the floor cure for at least 48 hours before moving heavy items back in.
Step 4: Maintenance Tips
Maintaining your diy epoxy garage floor is simple:
-
Regular Sweeping and Mopping: Prevents dirt buildup and maintains shine.
-
Avoid Harsh Chemicals: Use gentle, non-abrasive cleaners.
-
Place Mats at Entrances: Reduces debris and moisture from entering the garage.
-
Routine Inspections: Regularly inspect the floor for chips or cracks to address them promptly, extending the life of your epoxy surface.
Top DIY Epoxy Garage Floor Kits
There are many diy garage floor epoxy kits available on the market. Some of the top-rated kits include:
- Rust-Oleum EpoxyShield: Known for its durability and easy application process.
- Quikrete Epoxy Garage Floor Kit: Perfect for homeowners looking for a strong, glossy finish.
- KILZ 1-Part Epoxy Concrete and Garage Floor Paint: Offers excellent protection and a range of color options.
These kits typically include all the materials you need, such as epoxy resin, hardener, color chips, and sometimes even the application tools.
DIY Garage Floor Epoxy vs. Professional Installation
While a do-it-yourself epoxy garage floor project can be rewarding, it’s important to consider the benefits of professional installation as well. Professionals ensure that surface preparation is flawless, application is smooth, and curing is optimal for long-term durability. However, if you prefer the satisfaction of completing it yourself, a DIY project remains a fantastic option.
Common Mistakes to Avoid
- Skipping Surface Preparation: Failing to clean and etch the concrete properly can lead to poor adhesion.
- Applying Epoxy on a Moist Surface: Any moisture can prevent the epoxy from bonding correctly.
- Not Mixing the Epoxy Thoroughly: Inconsistent mixing can result in uneven finishes.
- Ignoring Cure Times: Rushing the process can cause peeling and cracking.
Enhancing Your Epoxy Garage Floor
One of the great advantages of epoxy is its versatility. You can add metallic flakes, color chips, or even custom designs to elevate the aesthetic appeal. For those seeking a showroom finish, high-gloss topcoats are an excellent choice that amplifies the shine and makes the floor pop.
Epoxy Garage Floor for Heavy-Duty Use
Epoxy garage floors are built to withstand heavy-duty use, making them the perfect choice for workshops, home gyms, and storage areas. Their durability allows them to handle the weight of large vehicles, heavy machinery, and even industrial-grade equipment without cracking or chipping. Unlike traditional concrete, which can degrade over time, epoxy creates a seamless, hard-wearing surface that stands up to constant pressure. This resilience not only protects your garage floor but also enhances its lifespan, saving you money on costly repairs. For those who demand strength and reliability, epoxy flooring is the ideal long-term solution.
Epoxy Flooring: A Smart Investment for Property Value
Adding an epoxy garage floor is more than just an aesthetic upgrade; it’s a smart investment that can increase the value of your property. Homebuyers appreciate the polished look and low-maintenance features that epoxy flooring provides. Its resistance to stains, chemicals, and wear makes it a highly desirable feature in any garage or workspace. Furthermore, epoxy’s reflective surface enhances lighting, creating a brighter and more inviting space. Whether you plan to sell soon or simply want to enhance your property’s appeal, an epoxy garage floor is a wise choice that pays off over time.
Environmental Benefits of Epoxy Flooring
Epoxy is not just durable; it’s also environmentally friendly. Its seamless surface reduces dust and prevents mold growth, contributing to better indoor air quality. Additionally, its reflective properties can reduce the need for extra lighting, saving energy in the long term.
Epoxy Flooring for All Seasons
One of the standout features of epoxy flooring is its ability to withstand various weather conditions. Whether it’s the sweltering heat of summer or the icy chill of winter, epoxy remains strong and intact, providing protection year-round without cracking or peeling.
Get Started on Your DIY Epoxy Garage Floor Today!
Ready to transform your garage? Contact Epoxy Flooring Detroit for top-quality materials and expert advice. Whether you go the DIY route or prefer professional installation, we’ve got you covered.
Call Now: 313-241-5722
Epoxy Flooring Detroit – Turning your garage into a polished, durable space.